
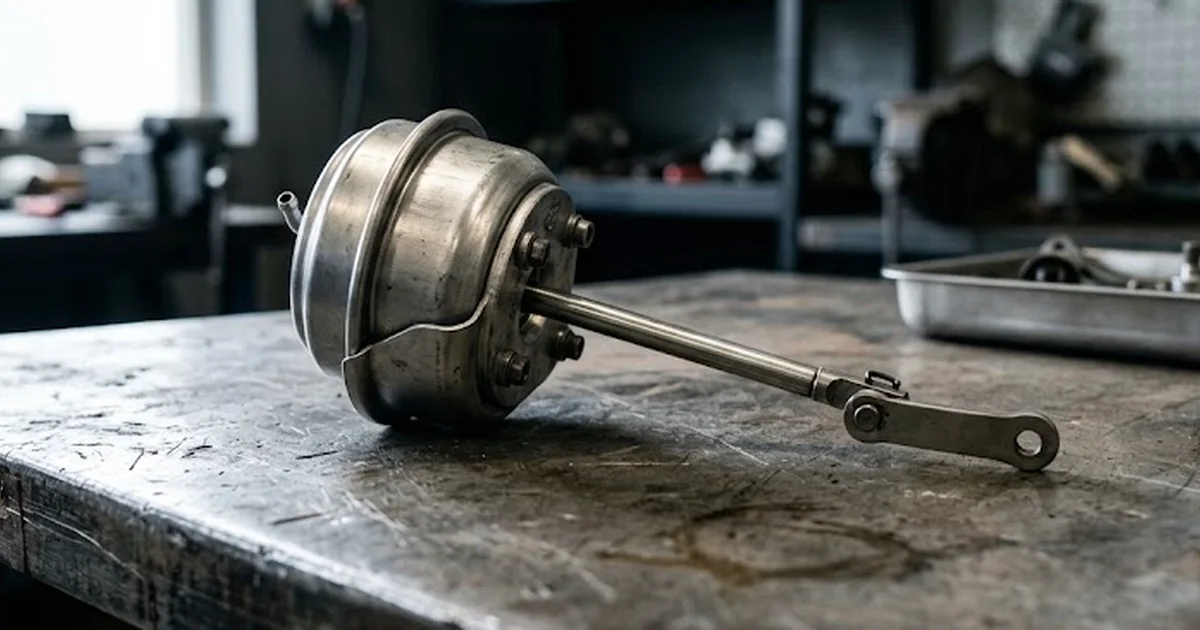
Turbo actuator replacement: what fitting or refitting the part really involves
Thinking about turbo actuator replacement? Here's what fitting or refitting the part genuinely involves, from diagnosis to calibration and testing.
A failing turbo actuator rarely announces itself politely. One day the car feels flat under load, the next the engine management light is on and boost pressure seems to have a mind of its own. If you have landed here because you are weighing up a turbo actuator replacement, this guide walks you through what the job genuinely involves — from diagnosis through to the final road test — so you know exactly what you are dealing with before a spanner touches the car.
What a turbo actuator does and why it eventually needs replacing
The actuator is the small but hard-working component that controls the position of the wastegate or the variable nozzle vanes inside the turbocharger. It translates a signal — either mechanical vacuum pressure or an electronic command from the engine control unit — into physical movement that regulates how much exhaust gas drives the turbine. When it works correctly, boost pressure stays within a tight, predictable range. When it fails, that control disappears.
Actuators wear out for entirely mundane reasons: heat cycling, carbon build-up around the linkage, corrosion of the rod, or simple mechanical fatigue after tens of thousands of miles. On electronically controlled units, the internal motor and position sensor can also degrade or lose calibration over time.
- Constant exposure to engine bay heat accelerates wear on seals and bushings.
- Carbon and oil residue can seize the linkage, restricting free movement.
- Corrosion on the actuator rod causes stiction and inconsistent response.
- Electronic actuators can suffer from internal gear wear or sensor drift.
Signs that point towards a genuine actuator fault
Before committing to a replacement, it is worth confirming that the actuator — rather than the turbo itself, a boost hose, or a sensor — is actually at fault. Several symptoms overlap with other turbo-related issues, so a methodical check saves time and money.
Typical warning signs include:
- Sluggish acceleration or a noticeable lack of power under load.
- Boost pressure that surges, hunts, or fails to build smoothly.
- An illuminated engine management light with boost-related fault codes stored.
- Whistling, fluttering, or rattling noises from the turbo area at idle or on the overrun.
- Excessive black or grey smoke from the exhaust under acceleration.
- Limp mode being triggered repeatedly, especially on motorway inclines.
None of these symptoms is exclusive to the actuator, which is exactly why a proper diagnostic sequence matters before parts start getting swapped.
What fitting or refitting a turbo actuator really involves
This is where many owners underestimate the job. Replacing an actuator is rarely a five-minute bolt-on task, even though the part itself is small. The process typically breaks down into several distinct stages.
1. Diagnosis and confirmation
A technician will read stored fault codes, check live boost data, and often test the actuator's response using diagnostic software or a manual vacuum pump (for pneumatic units). This confirms whether the actuator itself has failed, or whether the fault lies elsewhere in the boost control system.
2. Access and removal
Depending on the vehicle, reaching the actuator can mean removing intercooler piping, heat shields, brackets, or even ancillary components that sit in the way. On some transverse engines, the turbo sits low and tight against the bulkhead, which turns a simple job into a lengthy one purely due to access constraints.
3. Disconnection and calibration reset
The linkage rod, electrical connector (on electronic units), and any vacuum lines are disconnected. On many modern vehicles, the actuator's position must be electronically reset or recalibrated once the new unit is fitted — skipping this step is one of the most common causes of comebacks.
4. Fitting the replacement
The new actuator is bolted into position, the linkage geometry is checked and adjusted if required, and all connectors and lines are reattached. Correct linkage length is critical: too short or too long, and the wastegate will never sit at the correct rest position.
5. Testing and verification
Once fitted, the system needs to be tested — ideally with diagnostic software that can command the actuator through its full range of movement, checking for smooth, consistent operation without hesitation or sticking. A road test under load confirms that boost builds correctly and that no fault codes return.
In our experience, the actual replacement of the actuator is often the quickest part of the job. What takes real skill — and what separates a proper repair from a temporary fix — is getting the linkage adjustment and any electronic recalibration right first time. We have seen plenty of "new actuator, same fault" cases that came down to a rod set half a turn out, or a reset step that was simply skipped.
Electronic versus pneumatic actuators: key differences that affect the job
Not all actuators are built the same way, and the type fitted to your turbo changes how the replacement is approached. Pneumatic actuators rely on vacuum or boost pressure acting on a diaphragm, while electronic actuators use a small motor and internal position sensor controlled directly by the engine management system.
| Aspect | Pneumatic actuator | Electronic actuator |
|---|---|---|
| Control method | Vacuum or boost pressure on a diaphragm | Electric motor with internal position sensor |
| Diagnosis tools needed | Hand vacuum pump, boost gauge | Diagnostic software with live actuator control |
| Calibration after fitting | Usually manual linkage adjustment only | Often requires electronic reset or relearn procedure |
| Common failure points | Diaphragm splits, rod corrosion, hose leaks | Internal motor wear, sensor drift, connector corrosion |
| Typical complexity of the job | Moderate | Higher, due to electronic dependencies |
Common mistakes made during a turbo actuator replacement
A surprising number of repeat failures trace back to avoidable errors during fitting rather than the part itself being faulty. Knowing what to watch for helps you have an informed conversation with whoever is carrying out the work.
- Skipping the calibration step on electronic actuators, leaving the ECU with an incorrect reference point for boost control.
- Incorrect linkage length on adjustable rods, which throws off the wastegate rest position and causes boost inconsistency.
- Reusing worn clips or gaskets around vacuum connections, leading to small leaks that mimic actuator faults.
- Not checking the turbo shaft for play before condemning the actuator — a worn turbo can produce very similar symptoms.
- Ignoring related fault codes that point to a boost solenoid or sensor issue rather than the actuator itself.
Taking the time to rule out these possibilities before and after the job significantly reduces the chance of the same fault reappearing within weeks.
What to expect in terms of time, cost, and workshop process
Every vehicle is different, but there are some general patterns worth knowing before you book the work in or attempt it yourself.
Factors that influence how long and how involved the job will be:
- Engine layout and how accessible the turbocharger is — transverse engines in tight bays are typically slower jobs than longitudinal layouts.
- Whether the actuator is electronic (requiring software calibration) or pneumatic (requiring manual adjustment).
- The condition of surrounding components, such as intercooler pipework and vacuum hoses, which may need attention at the same time.
- Whether the turbocharger itself shows signs of wear that go beyond the actuator, potentially widening the scope of the repair.
A straightforward pneumatic actuator swap on an accessible engine can be a same-day job. An electronic actuator on a tightly packaged engine, requiring diagnostic calibration, understandably takes longer and demands the right software tools rather than guesswork.
Getting the right replacement part for your vehicle
Fitting quality only goes as far as the quality of the part being fitted. Actuators vary considerably between makes, models, and even engine variants within the same range, so matching the exact specification — including linkage geometry, mounting pattern, and control type — is essential. A part that looks similar but has a different rod length or a mismatched electronic interface will cause exactly the same symptoms you started with, only now with a freshly fitted component.
If you are sourcing a replacement, it is worth checking:
- The exact turbocharger part number, not just the vehicle model and engine size.
- Whether the actuator is pneumatic or electronic, and confirming the connector type if applicable.
- The condition and completeness of the linkage rod and mounting hardware supplied with the part.
Once you have the correct actuator confirmed against your turbocharger's specification, the fitting process described above becomes far more predictable, with fewer surprises during calibration and testing.
Bringing it all together
A turbo actuator replacement is a precise, methodical job rather than a quick parts swap. Getting it right means confirming the actual fault first, understanding whether you are dealing with a pneumatic or electronic system, taking care over linkage adjustment or calibration, and testing thoroughly before calling the job done. Skip any of these steps and you risk paying for a part twice over.
If you are still working out which actuator or turbocharger component matches your vehicle, browsing the Turbocharger category is a sensible next step to compare specifications and find the correct match for your engine before booking the work in.
Further reading
Frequently asked questions
Everything you need to know about this topic.
A question?
Get in touch directly.
Discussion
Our advice related to Turbo
 turbo
turboHow Do You Know If a Turbo Is Bad? Key Signs
Learn the telltale signs of a failing turbocharger, what causes turbo failure, and how to check your turbo before it leaves you stranded on the road.
 turbo
turboHow to Tell If Your Turbo Is Bad: Warning Signs
Learn how to tell if your turbo is bad before you buy a replacement. Spot the noises, smoke and power loss that reveal a genuine turbo fault.
 turbo
turboWhat Is a Turbo in a Car? Full Guide Explained
Discover what a turbo is, how it works, and why it boosts engine power. Clear, expert explanations for UK drivers, plus maintenance tips inside.