
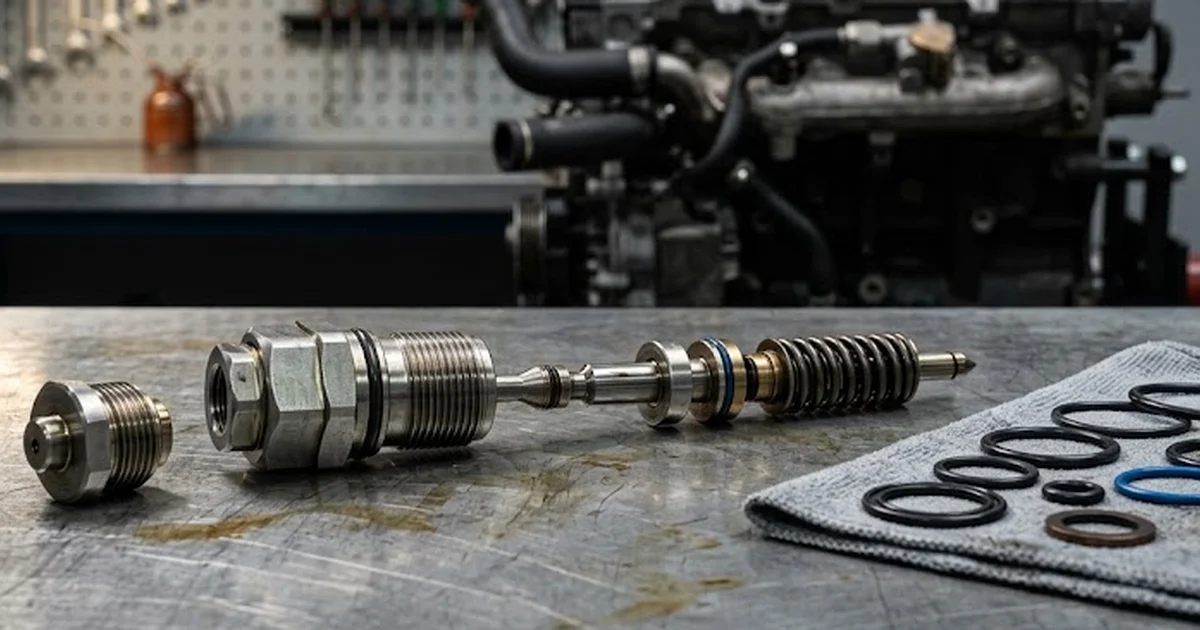
Injector repair: what mounting or reassembly of the part entails
Injector mounting or reassembly: steps, tightening torques, mistakes to avoid, and checks to perform for a reliable and long-lasting repair.
Repairing a injector is not just about replacing a worn nozzle or cleaning a clogged circuit. The mounting phase, or reassembly when the part has already been fitted to the vehicle, directly determines the longevity of the repair and the proper functioning of the engine. A poorly reassembled injector can leak, misdose fuel, or even damage the cylinder head. This article details what this operation, often underestimated compared to the initial diagnosis, actually entails.
Understanding the role of the injector and the challenges of reassembly
The injector is a precision component responsible for spraying fuel into the combustion chamber at a very specific pressure, timing, and flow rate. In common rail diesel engines, manufacturing tolerances are measured in microns. Mounting is therefore never a trivial operation: every contact, every seal, and every tightening torque affects sealing and performance.
Reassembling an injector means reintegrating a high-precision mechanical part into an environment where the slightest imperfection can compromise the high-pressure circuit's sealing. Here are the main challenges to keep in mind:
- Ensuring sealing between the injector and the cylinder head to prevent combustion gas leaks
- Ensuring correct nozzle positioning to preserve the spray pattern
- Respecting tightening torques to avoid deforming the injector body
- Checking the compatibility of seals and washers with the vehicle's exact model
- Verifying the absence of foreign bodies in the intake duct before reassembly
Key steps in mounting a repaired injector
Mounting an injector follows a precise methodology, whether the part is new, reconditioned, or restored after disassembly. Skipping a step or improvising a different order can lead to malfunctions that are sometimes difficult to diagnose later.
- Complete cleaning of the injector well and the housing in the cylinder head
- Visual inspection of the thread, electrical contacts, and injector body
- Systematic replacement of O-rings, sealing washers, and, if necessary, low-pressure hoses
- Positioning the injector in its housing without forcing the body
- Progressive and cross-tightening according to the recommended value for the model in question
- Reassembly of the supply rail and return lines
- Reconnection of electrical harnesses and continuity check
- Circuit bleeding and pressure test before starting
This sequence may seem simple on paper, but each step requires appropriate tools and constant vigilance, especially on engines where access to injectors is restricted.
Tightening torques, seals, and wear parts: what makes all the difference
The tightening torque is probably the most critical element of reassembly. Insufficient tightening causes a slow leak, sometimes invisible for several weeks. Excessive tightening can deform the injector body or crack the cylinder head, with consequences far more costly than a simple leak.
For information, and based on observations made in the workshop on different types of engines, here is a summary table of the general orders of magnitude encountered. These values are indicative and should always be verified on a case-by-case basis according to the vehicle's exact model:
| Type of injector | Indicative tightening torque | Parts to replace systematically | Main point of vigilance |
|---|---|---|---|
| Diesel common rail (low-pressure rail) | Moderate, progressive, and cross-tightening | O-rings, shim washer | Nozzle alignment in the well |
| Diesel common rail (retaining clamp) | Precise tightening, often in two stages | Sealing washer, clamp screws | Uniform pressure on the clamp |
| Direct gasoline injection | Light to moderate tightening | High-pressure O-ring | No pinching of the seal |
| Indirect gasoline injection | Low tightening | Rail seal, retaining clips | Correct positioning of the safety clip |
The sealing washers, a detail that cannot be overlooked
The shim washer placed under the diesel injector plays a crucial role: it adjusts the nozzle's position relative to the combustion chamber. Reusing a worn washer, even if it appears correct, is a common mistake that can cause poor fuel spray and incomplete combustion.
Common mistakes when reassembling an injector
Certain mistakes recur regularly, regardless of the experience level of the person performing the mounting. Identifying them helps avoid them and limits returns to the workshop for a problem that could have been anticipated.
- Reusing already compressed O-rings instead of replacing them systematically
- Tightening by feel without a torque wrench, which distorts the actual pressure applied
- Forgetting to clean the injector well, leaving carbon residue that prevents proper seating
- Reversing the tightening order on multi-injector rails, creating asymmetric tensions
- Neglecting to check electrical connectors, often a source of poor contact after reassembly
- Mounting an injector without verifying its exact compatibility with the vehicle's engine code
At autoKUR, we regularly find that the majority of returns after an injector repair are not due to the part itself, but to reassembly carried out too quickly. A seal reused for economy or an approximate tightening torque is enough to turn a successful repair into a recurring breakdown. Our conviction is simple: the time spent on reassembly must be at least as rigorous as that devoted to the initial diagnosis.
Checks and tests after reassembly: validating the repair
Once the injector is reassembled, the repair is not complete. A series of checks ensures that the entire circuit is functioning correctly before considering the vehicle ready to drive under normal conditions.
Here are the checks generally recommended after mounting or reassembling an injector:
- Visual check for leaks at the connections and injector well
- Verification of the fuel supply circuit's pressure buildup
- Listening to the engine at idle to detect any abnormal noise or unstable speed
- Reading fault codes via the diagnostic tool to ensure no electrical anomalies
- Checking the exhaust smoke, indicative of poor spray if excessive
- Progressive road test, monitoring engine temperature and acceleration response
These control steps are essential to distinguish a truly completed repair from a mounting that seems correct at first glance but will reveal its weaknesses after a few hundred kilometers.
When to call a professional for mounting
While diagnosing a faulty injector can sometimes be done by an informed motorist, mounting itself requires specific tools and practical experience with tightening torques, alignment, and tolerances specific to each engine. Some situations particularly justify entrusting this operation to a professional.
| Situation | Recommendation |
|---|---|
| Lack of a suitable torque wrench | Entrust the mounting to a equipped workshop |
| Piezoelectric injector or complex system | Prefer mounting supervised by a technician |
| First disassembly on this type of engine | Seek assistance or a post-mounting check |
| Doubt about the exact reference of the seals | Have compatibility validated before reassembly |
Post-mounting follow-up, a too often neglected step
Even when reassembly has been carried out correctly, monitoring during the first few days of use remains useful. A slight fuel odor, irregular idle, or an engine warning light that comes on after a few kilometers are signals not to be ignored: they often indicate a mounting point to review rather than a defect in the repaired part itself.
Summary: mounting, a step as decisive as the repair itself
Mounting or reassembling an injector represents a full phase of the repair, just like diagnosis or restoring the part. Respecting tightening torques, systematically replacing seals, cleaning the injector well, and rigorous checks after the intervention are all conditions for ensuring the engine's long-term reliability. Neglecting this step, even on a perfectly repaired part, means risking the reappearance of the initial symptoms a few weeks later.
To find all the injector references compatible with your vehicle, the autoKUR Injector category allows you to compare available models and prepare your replacement or repair with peace of mind.
You may also like
A question?
Get in touch directly.

Discussion
Our advice related to Injector
 Injector
Reconditioned Injectors: New vs Exchange vs Used
Compare new, reconditioned, and used fuel injectors. Discover technical differences, core deposit savings, and calibration standards for reliable engine repair.
 Injector
Car Injector Replacement: Fitting & Refitting Guide
Discover what car injector replacement really involves: mechanical seating, copper washer renewal, clamp torquing, ECU coding, and high-pressure fuel priming.
 Injector
How to Remove a Stuck Injector: Safe Extraction Guide
Learn how to remove a stuck injector safely without damaging the cylinder head. Discover proven chemical, mechanical, and hydraulic extraction techniques.